
Elementor advertises itself as a no-code pagebuilder, but there are still times where a little extra CSS comes in handy. I frequently turn to CSS for things like button styling, filter effects, and pseudo-elements.
And while Elementor Pro includes a handy custom CSS module, users of the free version of Elementor have to turn to 3rd-party solutions and workarounds.
Fortunately, it’s easy to add CSS to Elementor Free pages and layouts. There are several methods available, and two don’t even require installing a plugin.
Methods to add custom CSS to Elementor (free):
- Use the HTML Widget (best for single-use CSS)
- Use the WordPress Customizer
- Use a CSS Plugin
- Enqueue your own CSS files (advanced)
Add CSS with the HTML Widget
Websites use inline CSS all the time. ‘Inline’ means the CSS rules are embedded in the HTML page itself, rather than pulled from a separate stylesheet. In fact, inline styles can be great for page speed, because you can load only the exact styles needed on this page.
When to use this method: This is best for one-off styles, used on a specific template or page. If you plan to reuse these styles most of your Elementor pages, consider a method.
How to embed CSS with the Elementor HTML Widget
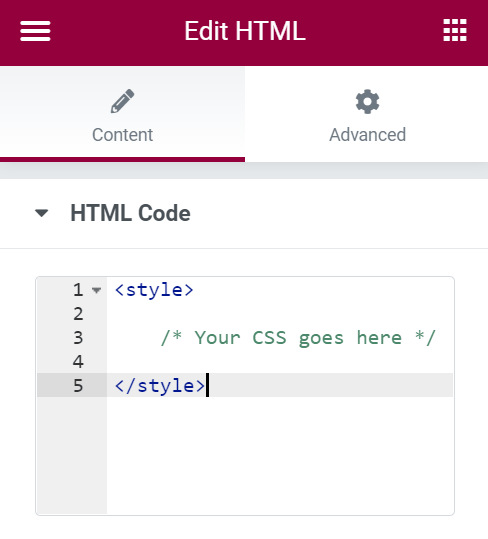
- Add an ‘HTML’ widget anywhere in your layout
- Add
<style> </style>tags - Write your CSS rules inside the
<style>tags.
Add your CSS to the WordPress Customizer
WordPress now has its own area where you can add CSS code to your site. It’s hidden at the bottom of the CSS customizer, but works fine in a pinch. One advantage of having it in the customizer is you can see your changes live while you write your code instead of having to reload the page.
Use this method if: You plan to reuse styles and classes on multiple Elementor layouts, and you’re not already using another CSS plugin.
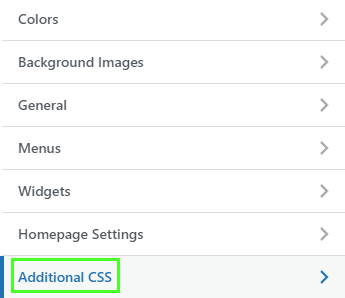
Adding CSS to Elementor using the Customizer
- On the front-end of your site, go to Customize > Additional CSS
- Add your code
Note: Elementor disables the admin bar while you’re designing, so you can’t access to Customizer until you close your Elementor layout.
Use a CSS Plugin
You might already have a CSS plugin installed on your site. Plugins like Simple CSS, Custom CSS Pro, and CSS Hero are great ways to keep your CSS separate from your theme. Most include syntax highlighting, and some even have code-completion or even automatic CSS writing.
Use this method if: You want your CSS code separate from your theme (the customizer CSS is theme-specific).
I frequently use a CSS plugin for my own sites, and I really like the live-view editing that shows your changes in real-time. Eventually, however, I tend to move more permanent CSS into my child theme or a separate custom stylesheet.
Recommended CSS Plugins:
These are all plugins that I have tested personally. Most are completely free, though the paid ones are way more powerful, because they essentially write the CSS for you.
- Simple CSS (free) – This free plugin gives you all the core features you need, like syntax highlighting, live editing, and page-specific CSS (add custom CSS to any page or post).
- Custom CSS Pro (free) – I use this plugin for many of my video tutorials (mostly because it zooms with the page for better legibility on small screens). It has an annoying quirk, however, that takes you back to the home page whenever you open it.
My personal pick would be Simple CSS. It has syntax highlighting and two skins (light and dark). But the most useful feature in this instance is the page-specific CSS, that is only enqueued for that specific page. This is really handy when adding CSS for a specific Elementor layout.
Enqueue a custom stylesheet (advanced)
If you’ve got some basic developer skills and are comfortable working with FTP or SSH, you can easily enqueue your own custom stylesheet that will be loaded on any Elementor layout.
Simply create a custom stylesheet in the root of your theme directory. For example, I’ll call it my-elementor-styles.css
Then we can enqueue it whenever Elementor styles are loaded using the elementor/frontend/before_enqueue_scripts hook.
Example code:
add_action( 'elementor/frontend/before_enqueue_scripts', function() {
   wp_enqueue_script(
   	'my-elementor-styles',
   	get_stylesheet_uri()
   );
} );Code language: JavaScript (javascript)
You can put this code in your functions.php file, and it should fire only on pages built with Elementor.
Key Takeaways
While there are 4 basic methods to add your own Elementor styles, two stand out to me as the best options.
- Embed CSS with the HTML Widget – If you’re writing one-off code that will only be used in a single Elementor layout or template, just embed it directly in the page. It will save precious milliseconds on your sitewide page speed scores.
- Use a CSS Plugin – For CSS code that gets re-used, use a plugin like Simple CSS. Using a plugin is better than the ‘additional CSS’ section of the Customizer, because it’s not tied to your theme, and won’t break your styles if you switch themes.
Which method do you prefer, and what do you use CSS for on your Elementor pages? Let me know in the comments below.