

Shortcodes have been around nearly as long as WordPress itself because they’re incredibly useful. Shortcodes let you dynamically insert content into your posts, pages & widgets, and are make it easy to insert reuseable components on your site.
And even though the Shortcode API is built with PHP, it’s completely possible to create shortcodes without PHP, using just simple HTML and CSS.
In this tutorial, you’ll learn how to easily make custom Shortcodes from scratch. And you won’t need a single line of PHP or Javascript.
Gorgeous, responsive shortcodes just like this:
This is made possible by using a Shortcode creator plugin. These plugins provide a simpler interface to access the Shortcode API and handle all the php scripting for you, so you never have to touch it.
Recommended Plugins for Custom Shortcodes
- Shortcodes Ultimate Pro (paid)
- Shortcoder (free)
Each of these plugins has its own advantages, and this tutorial will cover the Shortcode creation process for each.
In this article
Two Plugins to create your own Shortcodes
There are several plugins that allow you to create your own Shortcodes without php code. But there are only two worth considering:
- Shortcode Creator (included with Shortcodes Ultimate Pro)
- Shortcoder (100% free)
Both of these plugins are excellent but they have significant differences in terms of their capabilities, UI and templating method.
Shortcodes Ultimate Shortcode Creator
Shortcode Creator is the option I use most often, in part because I install Shortcodes Ultimate on nearly every site. But there some key features that I like:
The ‘Shortcode’ button in the Gutenberg toolbar is worth the price to me all by itself. It automatically appears when editing a Shortcode block, heading, paragraph or Slassic block. So your custom shortcodes are just a click away.

My only complaint about SU’s shortcode creator is that there’s no way to pull data from custom fields into your Shortcode unless you use PHP. Hopefully that will change in the future.
Shortcoder
Shortcoder’s functionality is very similar to the Shortcode Creator add-on for Shortcodes Ultimate. But there are some key differences to be aware of.
First, the UI is a bit less polished and you don’t get as nice an interface when choosing attributes while inserting Shortcodes.
Second, it supports HTML, JavaScript and CSS but no php. That’s a dealbreaker if you want any sort of complex logic (such as an if/else block).
It’s also not quite as easy to use when you want to add a shortcode to a post. The Shortcoder toolbar button is hidden under the inline-formatting dropdown (but is available in most blocks).
Key advantage: The best feature of Shortcoder, however, is that it natively supports custom fields. So you can display custom field data in your shortcodes without touching PHP. We’ll take a closer look at that in the walkthrough below.
Shortcode Basics
Shortcodes are like a macro function. WordPress parses the Shortcode and its parameters, and then generates the HTML content which will be inserted into the post. Shortcodes can be used to create almost any kind of content, from galleries to post grids to styled Tablepress tables.
Creating a Shortcode w/ Shortcode Creator (Shortcodes Ultimate)
Let me walk you through the process of creating your own shortcodes with the Shortcodes Ultimate custom shortcodes add-on.
1. Install and activate the add-on
Obviously you need to purchase and install the custom shortcodes addon (or buy the complete bundle at a discount).
Then, download the add-on and upload the zip file to your wordpress site under Plugins > Add new
Finally, activate the add-on and enter your license key to validate the license.
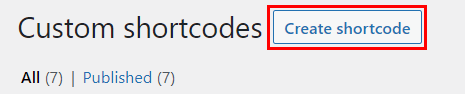
2. Create a New Shortcode
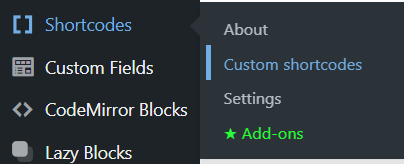
From the admin area’s left sidebar, go to Shortcodes > Custom Shortcodes >create shortcode
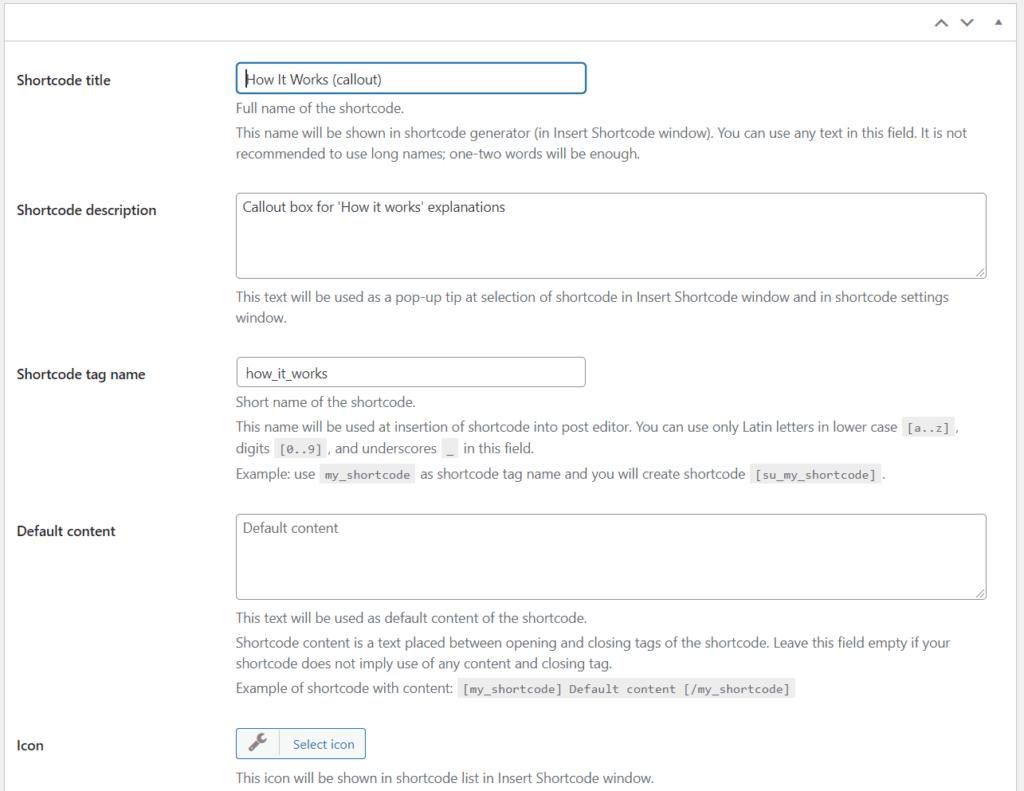
Then fill out a bit of descriptive information about your shortcode, including:
- Title – The Shortcode name that will be visible when choosing a shortcode to insert
- Description – Brief description of the Shortcode so authors/editors know what it does and how to use it
- Shortcode Name – This is the Shortcode slug that will be used to insert the shortcode.
- Default Content – What will be the placeholder ‘inner-content’ of the Shortcode (optional)
- Icon – Choose an icon that will show up in the back-end UI when inserting a shortcode
Here’s how I filled out the fields for a custom shortcode I use here on BTW:
3. Create Shortcode Attributes
Next up, you can create custom attributes for the shortcode. These are like variables that can modify the code that gets displayed on the front end.
Shortcodes ultimate gives you multiple field types to use for your attributes.
Field Types:
- Text
- Number
- Color
- Dropdown
- Switch/Toggle
- Icon
- Media Library
- Image Source (URL)
For this example I’m going to be creating a simple icon callout box. Here’s the attributes we’ll use:
- Text: Optional heading for the callout box
- Dropdown Menu: Choose one of the pre-defined callout designs
And if you wanted to kick this up a notch, you could add a color picker attribute to change the box color and even an icon picker to select custom icons instead of hardcoding the designs with HTML/CSS.
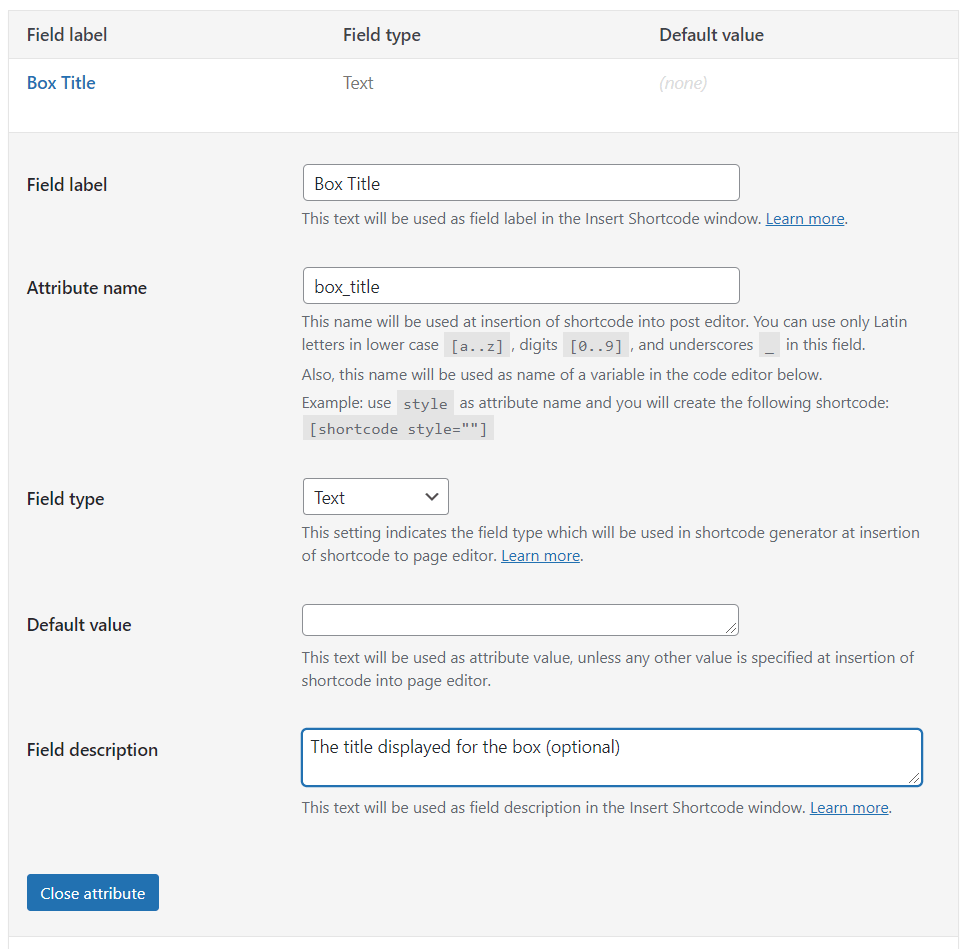
Text (Heading) attribute
This one is pretty straightforward. Create a label and and descriptive attribute name.
I’ll choose ‘text’ as the field type and leave the ‘default value’ blank so that nothing will be displayed if a title isn’t specified when the Shortcode is used.
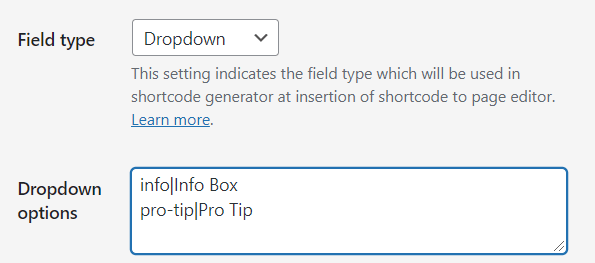
Dropdown (callout type) attribute
The dropdown is a bit trickier. We need to create label/value pairs. The Label is the text that is shown in the dropdown. The value is what is actually inserted into your HTML template.
In this case, I’m going to use this to insert a custom classname in the HTML markup which we’ll use to style the callout.
The format to use is:
value|Label (use the pipe character to separate them)
For this example I’m going to create two variations. It looks like this:
HTML Markup
Next we need to create the HTML template that will displayed on the front end. This is where we incorporate the attributes we just created.
Shortcodes Ultimate lets you work with HTMl (simple mode) or PHP (advanced). We’ll do HTML-only for this example.
First we’ll create the basic HTML template, then we’ll add the attributes.
We only need a few elements:
- wrapper – outer div with a custom-class (for styling purposes).
- Title container – Inner div to hold the (optional) heading
- Content container – Div to hold the box inner content
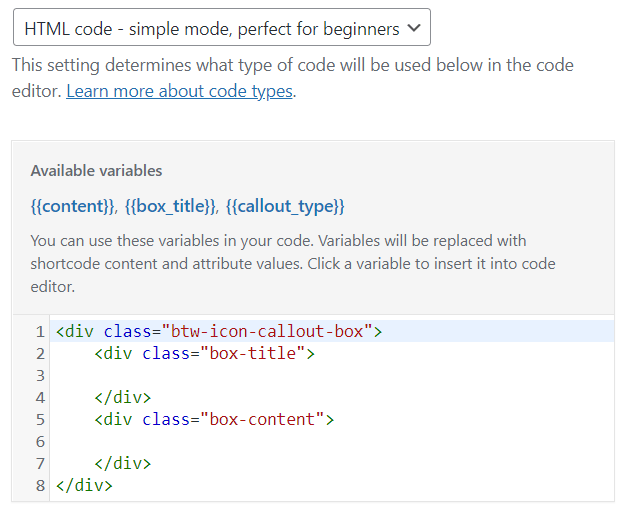
Next, you can insert the attributes where you want them to be displayed. The {{box_title}} and {{content}} will be inserted in their respective containers. The {{callout_type}} attribute will go inside the list of classes in the outer <div></div> wrapper.
You can type the attributes in manually or just click the attribute name to insert them whever the cursor is located. Like this:
Now you can go save your Shortcode and test it on the front end. It should work but there’s zero styling so it’s going to look pretty terrible. Nothing a little CSS can’t fix!
Adding the CSS
There are multiple variants of the callout box, but only a few things will change based on the attribute selection. We’ll be switching the color scheme and icon/image for the box. Everything else is the same (like spacing).
So lets create the base styles first.
Create the base styles
.btw-icon-callout-box {  /* style the container element */
	--primary-color: gray; /* define the default primary color */
	--accent-color: #ddd; /* define the default accent color */
    border: 1px solid var(--accent-color); /* set border-color to accent color */
    border-top: 4px solid var(--primary-color); /* set top border color to primary color */
    border-radius: 4px;
    padding: 20px 35px 20px 75px;
    margin: 1.3em auto; /* add vertical spacing */
    box-shadow: 0 0 10px rgb(0 0 0 / 15%);
    position: relative;  /* enables position:absolute; for the icon*/
}

.btw-icon-callout-box .box-title {     /* style the title */
	font-size: 23px;
	font-weight: 600;
}Code language: CSS (css)
Create a pseudo-element (to hold the icon)
Next up, we need to create a pseudo-element. This is what is going to hold the icon/image for our callout. Pseudo-elements are perfect because you can create them with pure CSS and change the background image for each variant of the callout box.
Each element can have up to two pseudo-elements. a :before and an :after. We only need one, so I’ll use :before.
.btw-icon-callout-box:before {
    content: ''; /* creates the pseudo-element */
    position: absolute;
    width: 48px;
    height: 48px;
    top: 12px; /* position our element 12px from top-left corner */
    left: 12px;
    background: no-repeat center/40px; /* position and size for background*/
    background-image: var(--image); /* CSS variable for the image URL */
}Code language: CSS (css)
Create the variants using CSS variables
I decided to use CSS variables in my code. This makes it really easy to definte multiple styles for this callout box. All I have to do is change these variables for each variant and it’ll completely change the CSS rules that are applied.
I’m using 3 different variables:
- –primary-color: Color used by the top border
- –accent-color: Color used by the other borders, including the icon border on mobile
- –image: The background image used for the
:beforepseudo-element
To create different variants, all we need to do is change those 3 variables for each new variation.
We’ll target are rules based on the CSS selector we inserted into the outer div element via the {{callout_type}} attribute.
Like this:
.btw-icon-callout-box.info {
    --primary-color: #ffea5a;
    --accent-color: #fff6b6;
    --image: url('/wp-content/uploads/2021/11/light-bulb-idea.svg');
}

.btw-icon-callout-box.pro-tip {
    --primary-color: #0faaeb;
    --accent-color: #a7d8ec;
    --image: url('/wp-content/uploads/2021/11/pro-tip.svg');
}Code language: CSS (css)
Make it Mobile-friendly
The default style uses a lot of left-padding to make room for the :before element that holds our icon.
But on smaller screens this will look unbalanced and squish the content.
So lets use a media query to center the icon and align it with the top border if the screen is narrower than 500 pixels.
For extra pizazz I’ve added a colored border (with the --primary-color variable) and some border radius.
/* these rules only apply to browsers < 500px wide */
@media screen and (max-width: 500px){

.btw-icon-callout-box { /* remove the unbalanced left padding */
	padding: 35px 25px;
}

.btw-icon-callout-box:before {
    left: 50%; /* moves left-edge to the center */
    top: 0; /* moves top-edge to the top */
    transform: translate(-50%, -50%); /* move up and left by 50% of :before's width */
    background-size: 32px;
    background-position: center;
    background-repeat: no-repeat;
    background-color: white;
    border-radius: 100px;
    border: 1px solid var(--primary-color);
    }
}Code language: CSS (css)
Look what we’ve built
Now let’s take a look at our handywork. Pretty stylish right?
At least it’s good enough for me. I’ll be using these throughout the site to draw attention to important concepts and make my articles more scannable.
Custom Shortcodes w/ Shortcoder
If you prefer a free option, Shortcoder is your best bet. Here’s how to create your own shortcodes with Shortcoder.
1. Create a new shortcode
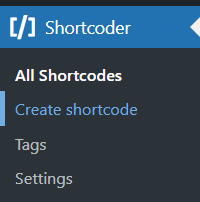
After installing and activating Shortcoder, you’ll find a new entry in your admin sidebar.
From the dashboard go to Shortcoder > Create shortcode
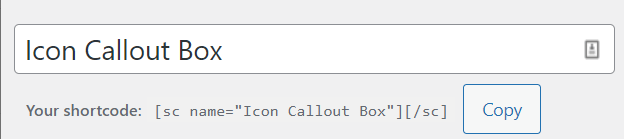
2. Name the Shortcode
Create a descriptive name for the shortcode. This will also be the shortcode slug used when you insert it into your posts.
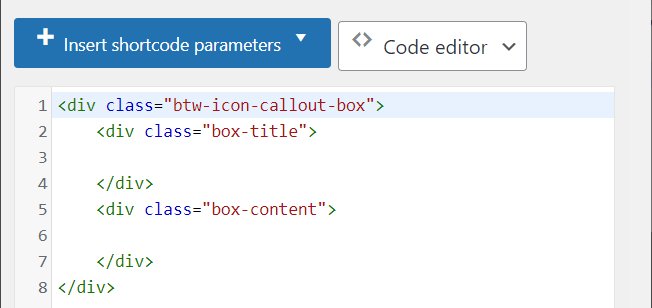
3. Create the HTML Template
You can create a shortcode template using either the visual editor, text editor, or code editor (HTML only). I prefer the code editor.
So first we’ll insert the wireframe code and add the attributes in the next step.
4. Add Attributes
Creating attributes in Shortcoder is different from the way you do it with Shortcodes Ultimate’s creator.
Instead of defining the attributes and then using them separately in the template, here you just add them on the fly.
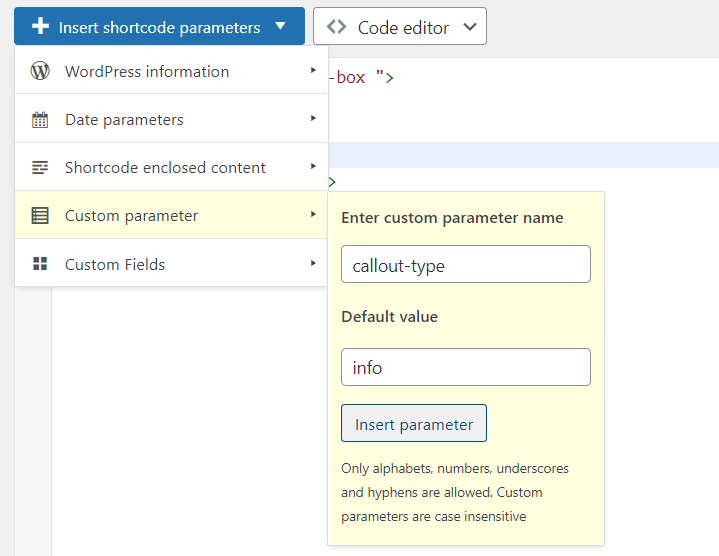
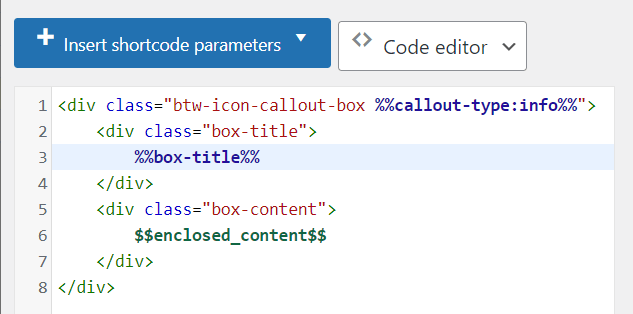
And because you don’t get fancy attribute types like Dropdowns, we have to get a bit more creative. Here’s what the template would look like in Shortcoder:
The syntax is a bit different than Shortcodes Ultimate, but still easy to manage with no PHP needed.
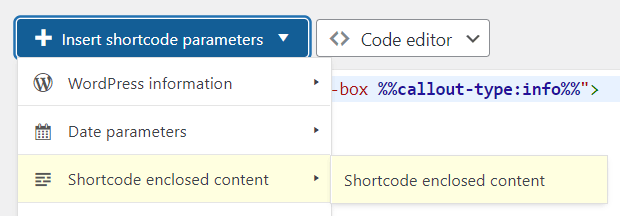
Here are the parameters were using:
- %%callout-type%% – Used to a add custom class to the container element. The default value is set to ‘info’ (if you don’t specify one when using the shortcode)
- %%box-title%% – A simple text string to use as the heading for the callout box
- $$enclosed_contents$$ – Whatever content is between the opening and closing shortcode tags
Note: the enclosed_contents parameter is a built-in parameter in Shortcoder.
And now our shortcode will output the exact same HTML as in the previous example with shortcodes ultimate. It just needs some CSS for styling.
5. Add CSS to your Shortcode
One of my biggest complains about Shortcoder is there’s no built-in method for adding CSS, and the documenation doesn’t even mention it.
So basically you have two options:
- Put the CSS somewhere else (like Customizer > Additional CSS)
- Inline in as part of your HTML template
I typically like to inline my shortcode CSS, especially if these shortcodes aren’t used on most pages and aren’t re-used too many times in the same page.
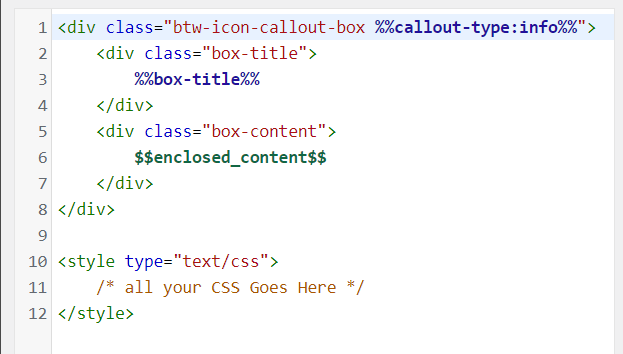
To inline your styles, just create a <style></style> tag at the bottom of your HTML template (in code editor view). Then paste the CSS between the style tags.
Like this:
6. Insert the Shortcode in a Post
There are three methods to use your custom Shortcoder shortcodes
- Use the Shortcoder gutenberg block
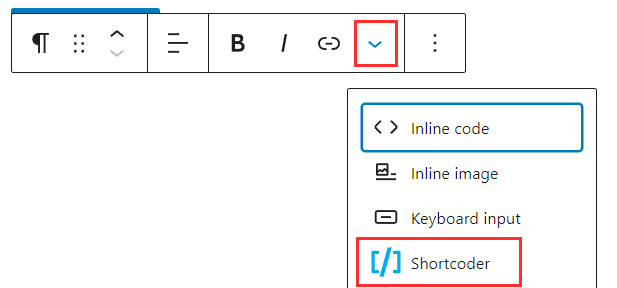
- Choose ‘Shortcoder’ from the inline-style dropdown
- Use the shortcode directly
The first two options are the best because you get a handy UI to find the shortcode you’re looking for and fill out the correct parameters. I recommend using the inline-dropdown (option #2) which is available in most block types.
Select a shortcode and edit parameters
You’ll be taken to a simple popup UI where you can select the shortcode you want. Then click the title to expand the box and edit the parameters. Like so:

Then just click ‘Insert Shortcode’ and you’re all set. Here’s what ours looks like after the styling is complete:
Summary & Additional Steps
It’s possible to make your own WordPress Shortcodes without PHP thanks to these two excellent plugins:
- Shortcode Creator add-on for Shortcodes Ultimate
- Shortcoder
I strongly prefer #1 (Shortcode Creator for SU). It has more features, a better UI, and lets you work with PHP as you improve your developer skills. The only negative is it’s a paid-addon whereas Shortcoder is free.
What custom shortcodes to build?
Your needs and imagination are the only limit to the shortcodes you can build. But here are some ideas, including shortcodes I’ve made for my own sites:
- Content Boxes – Any sort of styled content container or box. Use for notifications, table of contents, product callouts, etc.
- Fancy Headings
- Div wrapper – simple
<div></div>container with an optional class or ID that lets you wrap content and style it however you want. One example usage is hiding/filtering sections of your content with javascript. - Buttons
- Tab/Accordion
Examples with CSS
You can use shortcodes to display almost any kind of content using just CSS and HTML. And there are tons of free examples that you can clone or adapt, even if you aren’t skilled at CSS.
Sites w/ free examples:
- Free Frontend
- Codepen
- CSS Scan (buttons)
- Speckyboy (tabs)
Did you like this tutorial or have additional questions? Please let us know in the comments. And make sure to tell us about anything cool you built for your own site using custom Shortcodes.