
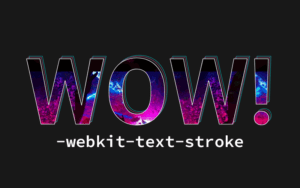
Cool typography is one of those simple tweaks that can really set a design apart. Gradient or outline text can elevate your webpage from generic to unique with a stroke (get it?).
Currently, Elementor doesn’t include a text-stroke feature, but it’s easy to get outlined text in Elementor by using either a free addon, or with a bit of custom CSS.
Example: some outlined text (with a gradient for fun)
Nice!
Outlined Text using Elementor Addons
There are several Elementor Addons that include a text-stroke effect. And one of them includes even more enhancements, including Gradient text and cool masking effects with animations.
That’s why Happy Addons gets my vote as the best option. And it’s not just the features, it’s the simplicity. Happy Addons adds a ‘stroke’ option to the default Heading widget, so you don’t even have to use some special widget to get the effect.
Which addons have outlined text?
So far I’ve found two free plugins that offer this feature:
How to outline text with Happy Addons
Here are the steps to get outlined (stroked) text with Happy addons:
- Install and activate the Happy Addons plugin (free or pro).
- Refresh your browser (if currently editing a page)
- Drag a compatible widget into your layout (e.g. Heading widget)
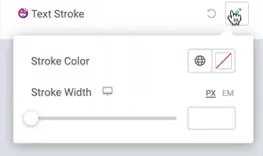
- Choose ‘text stroke‘ from the Content tab
- Set your stroke width and color
- Set the text color to transparent (optional) for an outline effect
Here’s a video example:
Outlined text with Premium Addons
Premium addons is another excellent addons package for Elementor. They have both a free and Pro version. It doesn’t quite have the range of text-enhancement options you get from HappyAddons, but the stroke effect is simple and useful.
Steps:
- Download and install the Premium Addons Plugin
- Reload the page if you’re currently editing an Elementor layout
- Choose the ‘Premium Heading’ widget
- Add the widget to your layout
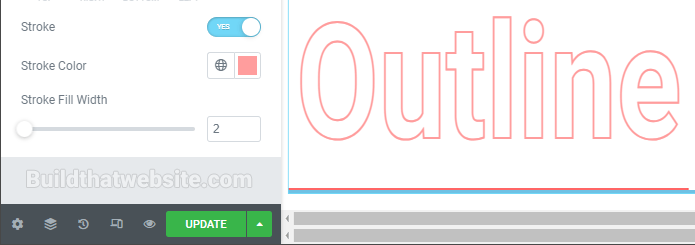
- In the Style tab, set the Stroke option to Yes.
- Choose a stroke width and stroke color
Stroked (Outline) Text Effect with CSS
Addons can be useful, but they add bulk to your WordPress install. And if you have to combine multiple addons to get the effects you want, the interface can get cluttered.
That’s why I try to do as much as I can with CSS instead of plugins, as long as it isn’t too much trouble.
Fortunately, stroked text is a pretty easy thing to do with CSS.
1. Add a selector to your target text
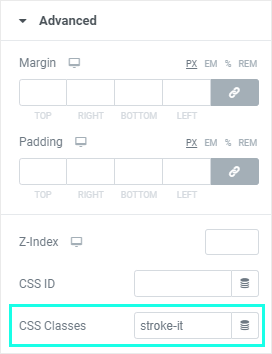
To target your CSS rules, you want to add a custom class to your element so it’s easy to make sure the CSS applies to that specific element. You can do this in the ‘advanced’ tab of any Elementor widget in the CSS Classes field.
Note: If you’re using the Pro version of Elementor, this is optional because you can just use the ‘selector’ shorthand in the Custom CSS box for that widget.
In this case, I’ve added a descriptive class called .stroke-it which we can target with the CSS rules.
2. Write the CSS to add a stroke
It only takes a single CSS rule to add the stroke. The property we’re using is -webkit-text-stroke which takes two arguments:
- The width of the stroke (outline)
- The stroke color
.stroke-it {
    -webkit-text-stroke: 2px hotpink; /* adjust width and color as needed */
}Code language: CSS (css)
Depending on what element you’re targeting, you may need to adjust your selector slightly by adding another Element inside the .stroke-it class wrapper. That’s because Elementor doesn’t add these classnames directly to the html element, but instead to its container.
For example, if styling an h2 heading, you might need to write:
.stroke-it h2 {
    -webkit-text-stroke: 2px hotpink; /* adjust width and color as needed */
}Code language: CSS (css)
Where to put the CSS Code?
If using the pro version, you can just use the ‘Custom CSS’ panel of the widget you’re adding the effect to. Most of the time, you’ll want to limit these rules to a specific page instead of putting them in a site-wide CSS file.
If you’re using the free version I recommend using this easy hack to embed your CSS in an HTML widget.
3. Optional Enhancements
- Outline-only: By default, your outlines element will keep its text color, but you can create a true ‘outline’ effect by setting the text color to transparent in the Elementor Style tab for that widget.
- Entrance Animations: Jazz up your page with entrance animations to have your fancy text fly in from the side, fade up, or any of the other easy effects.
- Motion Effects: If you layer multiple outlined text elements, you can create amazing designs that use motion effects to move them as you scroll. This is especially cool if you stack them on top of each other using absolute positioning and layered z-index.