

Generatepress is an infinitely flexible theme, so it can be used for pretty much anything. You can even build a one-page website with Generatepress (though it’s probably overkill).
It’s a pretty simple process if you just follow these steps:
- Choose a page builder (to design your one-page layout)
- Add the anchor targets (for each section)
- Setup your navigation menu
Project overview: what we’re building
The structure of a one-page site is pretty simple.
Navigation: You have a nav-bar at the top which contains jump-links to each section of the page. Usually, the navigation bar will be sticky or ‘fixed’ to the top of the viewport.
Content sections: Your one-page content is divided into sections. They’re often visually distinct with unique background colors and plenty of white-space for aesthetics and flow. We need a way to wrap each section in a container element so we can add an ID (below).
Anchor Links(ID): Each section will have a unique ID which we can use to target it with jump links (from the navigation menu).
Part 1. Create the Content/Sections
The first step is to create content for your one-page site. Later, we’ll add an anchor link to each section on the page.
Note: The sections don’t have to be visually distinct (though web designers will often use color or white-space to break up a page into sections).
Some options for creating the page content:
- Gutenberg Blocks: Use the standard WP editor
- Page Builder: Elementor, Beaver Builder, Thrive Architect etc…
- GeneratePress Sections: Built-in minimalist page builder with WYSIWYG editing
It doesn’t matter which option you choose, the rest of the setup is pretty much identical. Choose whichever method you’re most comfortable with for designing a layout.
Here’s the basic steps for each:
Build it with Gutenberg
The WordPress block editor can be used as a full-fledged pagebuilder, especially if you add a few helper plugins like GenerateBlocks (for layout) and Kadence blocks or Stackable for extra block types.
Here are the steps:
1. Create the sections
You can use Generateblocks to add a container block for each section, or you can just create the sections visually by using H2 headings with dividers between them (optional).
A basic template might look like this:

The advantage of using Generateblocks is you can wrap each section in its own container, and add a background image or color to the entire section.
2. Add the anchor ID’s
Each block has an ‘HTML anchor’ field under the ‘advanced’ tab of the block settings. Choose one element to be the anchor for each section (where the viewport will scroll to when you click the jump-link).
Add a unique ID name for each section.
Typically, you’d add the anchor link to the main section heading (or the container block if using Generateblocks).
Use a pagebuilder like Elementor/Beaver Builder
Most people use a page-builder like Elementor to design their one-page sites. Pagebuilders are modular from the ground up and already include container elements like rows/sections.
The exact steps are pretty similar regardless of which page builder you prefer.
1. Create the page sections & content
Layout the page using a new section for each area of content you want to link to. Then fill out the content inside each section.
2. Add the anchor ID’s
Assign a unique ID to each wrapper section or row. This is how we’ll target the navigation links.
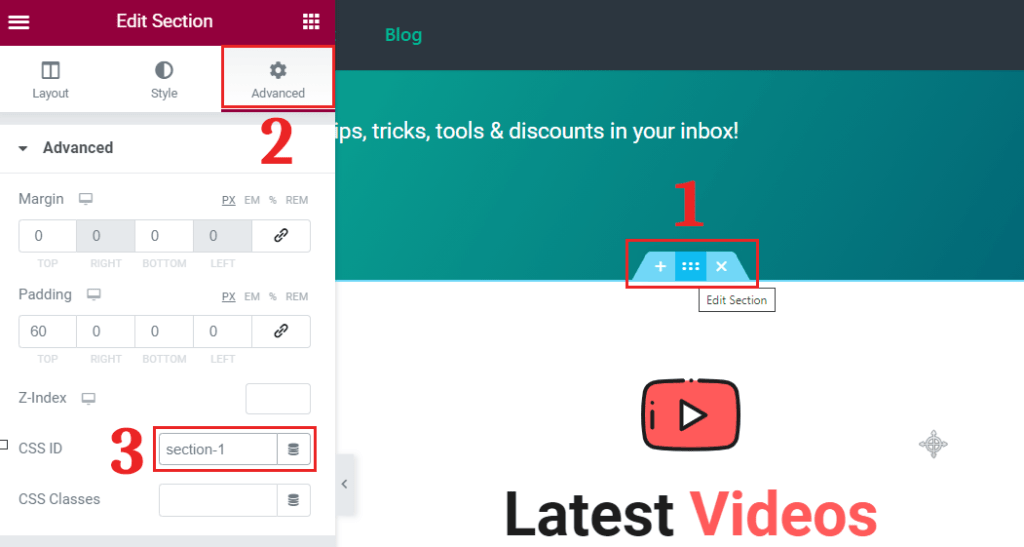
Here’s how to do it in Elementor:
- Selection the section by hovering over it and grabbing the tab (or select it in the Navigator)
- Go to the Advanced tab of the section settings
- Enter a unique CSS ID
Use Generatepress Sections
Sections is a minimalist pagebuilder integrated into Generatepress premium. It lets you add individual Sections to a page, which can then be filled with content, styled (spacing and background colors) and given a CSS class or ID.
Note: Sections have a WYSIWYG editor, similar to the WordPress ‘classic’ editor. You can’t (yet) add Gutenberg blocks inside a Generatepress section.
1. Enable the sections module
From the dashboard, go to Appearance > Generatepress > Modules
Then, ensure the Sections module is active.
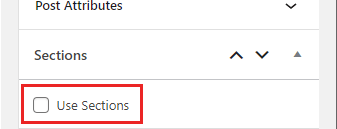
2. Activate Sections for the page
When editing your page, go to the post settings (click the ⚙️ ‘Gear’ icon in the top right) and scroll down until you see Sections.
Then enable Use Sections.
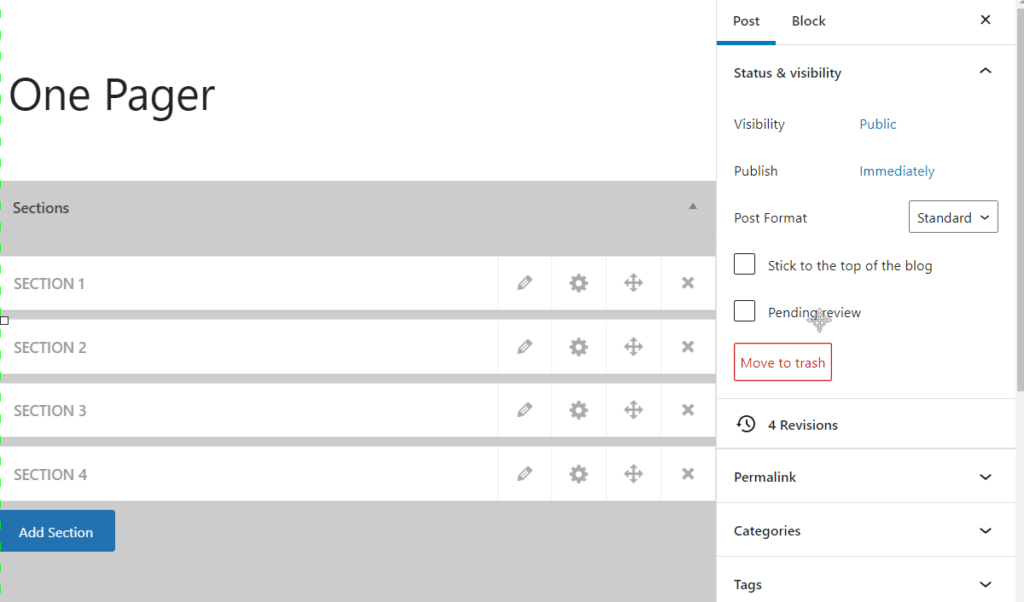
3. Build your sections
Create as many ‘Sections’ as you need, then fill each with content, using the WYSIWYG editor. You can also give each section a label (section one, section two, etc..).
Note, labels are not the same as CSS ID’s.
4. Style your Sections & add anchor ID
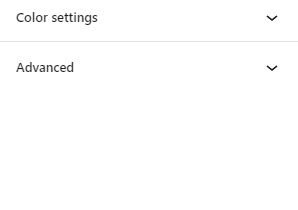
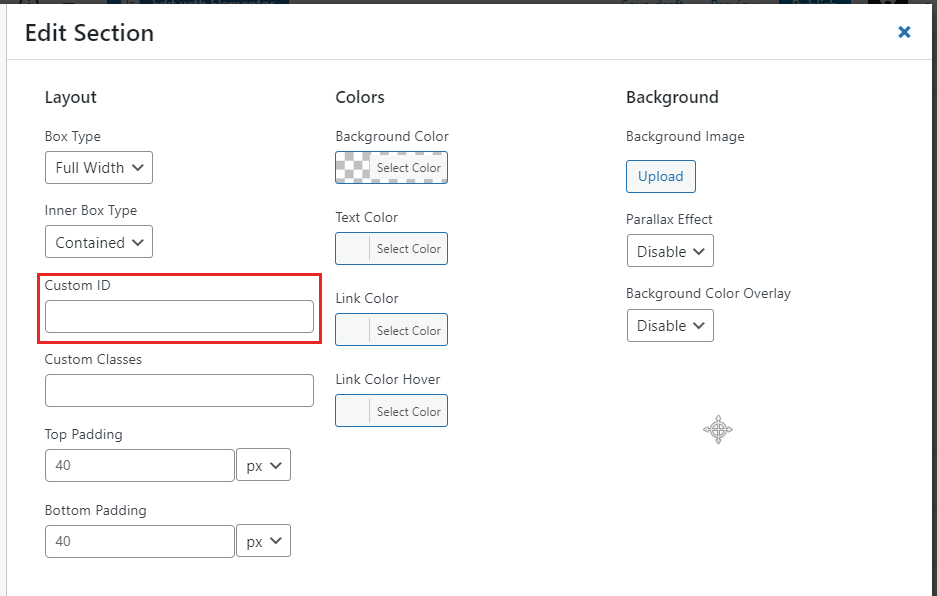
In the section layout view (shown above) click the gear icon to edit the settings for that section.
Here you’ll find style settings such as the section background, scroll effect, section width (and inner-width).
Add the ID: This is also where you’ll add the unique ID for the section. Just fill enter the ID name in the box labelled ‘Custom ID’.
Part 2. Create the Navigation
You don’t need any fancy plugins to create one-page navigation. We’ll just use the native WordPress menu.
Add anchor links to the Menu
Go to Appearance > Menus
The create a new menu. Call it anything you like.
Unlike a standard site, we don’t have any existing posts, categories or pages to add to the menu. Instead, choose the ‘custom links’ option.
Add one link for each Section/ID of your one-page site.
Url: #section-ID (e.g. #features)
Link Text: Section name (however you want it to appear in the menu)
For example: If you had 5 sections, About, Why Us, Features, Testimonials, Buy
Your menu might look like this:
Make the navigation sticky
Most one-page sites use a sticky/fixed navigation bar at the top of the view port, so that the visitor can easily navigate between sections. This is easy to do with Generatepress. The premium version has built-in sticky navigation, or you can use one of these other methods.
First, make sure you’ve assigned your new menu to the Primary Menu location of Generatepress (in Appearance > Menus).
To enable sticky navigation:
- Go to Customizer > Layout > Sticky Navigation
- Turn Sticky Navigation to On
- Configure any other sticky navigation options
- Click Publish to save your Customizer settings.
Congratulations! Your one-page site should be finished and ready to launch. And if you don’t have quality hosting yet, make sure to check out Cloudways.
Summary
Generatepress is perfectly capable of creating a one-page website. All you need to do is choose how you want to build out your page content (Gutenberg, Page Builder, or Sections). Everything else is pretty easy.
Here are the steps again:
- Build that page content, divided visually to each section
- Add a CSS ID to each section, either to the section container or the first element in the section.
- Create your navigation using the WordPress menu
- Add your Jump-Links (anchor links) using the format: #sectionID
- Assign your menu to the ‘Primary Menu’ Location.
- Make the navigation sticky
- Celebrate a job well done!
If you have any questions or difficulties setting up your own one-pager, let us know in the comments.