
So you designed a beautiful layout or pricing table using columns in Elementor. But there’s no way to add a link to the column itself.
Don’t worry, it’s really simple to make clickable columns in Elementor, just like this:

Methods:
It’s also possible to do this with custom javascript, but it’s more complicated to implement and won’t work in all browsers so I won’t cover that here.
Just so you know: Both these methods work with the free version of Elementor (though I personally think the pro version is well worth the price).
1. Use a plugin to make clickable columns
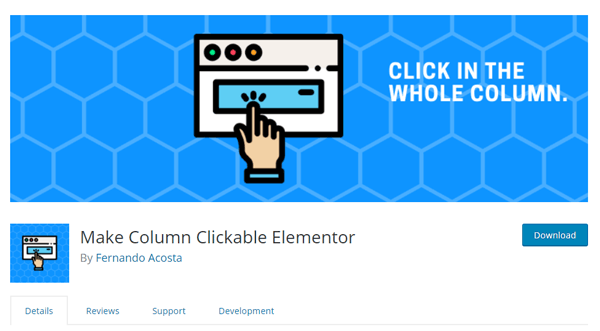
There is a WordPress plugin for pretty much everything, and this is no exception. Enter Make Columns Clickable Elementor, the aptly-named free plugin available in the official WordPress repository.
In my opinion, this is the best solution and will give you more features and a better UI than the other workarounds.
And don’t worry about plugin bloat or slowing down your site. This plugin is a tiny 5KB script, and won’t impact front-end performance at all.
How to use it
Simply install and activate the plugin, then reload your Elementor page if you’re currently designing one.
Now click on a column and you’ll see this:
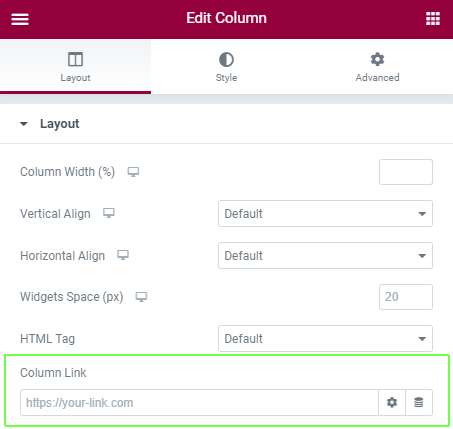
And you can add a link to any URL (external or on your site) simply by typing it into the field.
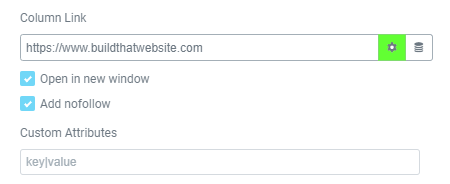
There are also additional settings if you click the ‘gear’ ⚙️ icon. This allows you to no-follow the link, open it in a new window, or add custom attributes (e.g. for enhanced event tracking).
2. Pure CSS clickable columns
This method is great because of it’s simplicity. There are no plugins to install, custom php or javascript. It’s just a few lines of CSS code.
How it works: We’ll take advantage of css pseudo-elements which allow you to create an html element using only css (no HTML). Pseudo-elements of a link (<a>yourlink</a>) are clickable just like the link itself. We’ll use CSS to stretch the pseudo-element to the full size of the parent column.
Here’s how to use it:
- Add a link or button with the URL you want to use
- Add a ‘clickable’ class to your column
- Add the CSS code to your site
Step 1. Put a link in your column
This link is what we’re going to stretch to fill the column. Set the URL, rel attributes (eg. ‘nofollow’) you want.
You can use any kind of link (including buttons) as long as it is (or contains) and <a></a> tag.
In my example, I’ve built a pricing table out of columns, and put a button in each column with a link.

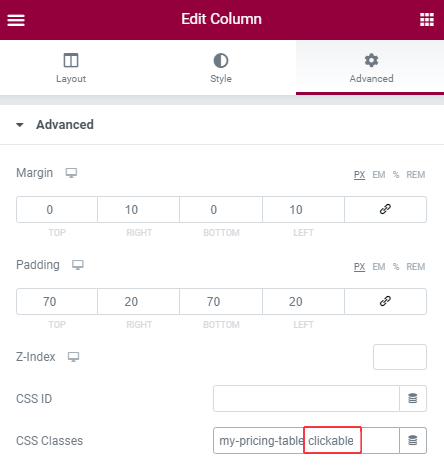
Step 2. Add a ‘clickable’ class
We need to add a custom CSS class to our columns, so we can specify which ones are clickable and which aren’t. You can name it anything you like, but I’ll call it ‘clickable’ or simplicity.
- Click on your column settings (column icon in the top left corner)
- Go to the advanced tab
- Add a class
Step 3. Add this Custom CSS to your Site
Here’s the CSS required to make this all work. If you’re using Elementor pro, you can put this in your Elementor global CSS file.
Otherwise, add it wherever you put your custom CSS. The ‘additional CSS’ section of the WordPress customizer is a backup option.
/* Create and position :after pseudo-element */

.elementor-column.clickable a:after {
   content: "";
   display: block;
   position: absolute;
   top: 0;
   left: 0;
   right: 0;
   bottom: 0;
   z-index: 2;
}

/* Remove relatively-positioned parent elements in column */

.clickable .elementor-widget, .clickable .elementor-widget-wrap {
   position: static;
}Code language: CSS (css)
What does this CSS do?
The first block of CSS creates our pseudo-element. The line below actually creates the :after element.
content: "";Code language: JavaScript (javascript)Then we make it a block element and position it absolutely which allows us to take it out of flow.
By setting top, right, bottom, and left to 0, we’re making the :after element as large as it’s nearest parent set to:
position: relative;The second code block changes the position of two classes (.elementor-widget and .elementor-widget-wrap) to:
position: static;Code language: JavaScript (javascript)Why do it? Because by default these are set to position: relative, and since these inner blocks are smaller than the column, they would limit the :after pseudo-element from spanning the full column.
Summary
We’ve covered the two best methods for making clickable columns in Elementor. Even though the CSS solution is straightforward (and works great), I still recommend using the Plugin method for most users.
Why the plugin? The UI is great, it’s lightweight, and you don’t have to remember the clickable class name every time you want to use this trick. It also lets you make link-able columns without having an actual link or button inside.
Thank you for the code snippet. It worked like a charm after adding the missing semicolon after bottom: 0
Oops! Thanks for that, I updated the code.
Hi,
I have updated this code in the elementor column but when I hover the mouse it keeps shaking. Links seems working fine for now but the it flitters when on hover.
Do you suggest any further changes to the code?
Thanks
The code works fine for me as written. I’m actually using it on my card designs here: https://www.buildthatwebsite.com/blog
I think the shaking glitch may have something to do with other CSS code on your site or theme.
Hello – thank you very much for this very handy bit of code. I had used ‘Kaycinho The Digital Alchemist’ version first but if I ever went back to edit the column it would redirect me to the link while editing. Which was endlessly frustrating.
While editing the column: Do you know why a Background Overlay would now overlay would now grey out the entire column (including the text) when using your code? I just took off the hover effect so it wouldn’t anymore. But I was wondering if there was a way to just have it on the background if possible. Thanks!
I’d have to see your site to be sure, but I believe the background-overlay uses pseudo-elements as well. The fact that we removed ‘position: relative;’ from some parent elements may be causing the issue.
If this is the case, you likely need to either use the plugin method or avoid using overlays for columns that you want clickable.
I have multiple Elementor widgets inside of a column but can’t seem to get the dead space between the widgets to “be clickable”.
If you have an image then a heading widget inside of a column is there any way to get the dead space between them to “be clickable” by making the entire column a link?
If the gap is a fixed size in pixels, you could use the CSS method and use negative positioning values to move the clickable container outside the element’s boundaries.
Perfect!
Still working 🙂